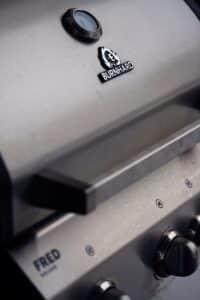
Introduction
If you’ve spotted orange-brown patches on your grill grates, you’re looking at more than just a cosmetic issue. Rust can make food stick, affect heat distribution, and, in severe cases, cause flakes to end up in your meals. Left unchecked, it can shorten your grill’s lifespan and turn a weekend cookout into a frustrating experience.
The good news? Rust doesn’t always mean your grates are beyond saving. With the right techniques, you can remove it without damaging the surface — and take steps to make sure it doesn’t return.
In this guide, we’ll break down why rust forms, how to tell if your grates can be restored, the exact process for cleaning them safely, and what long-term maintenance will keep them in top shape.
Why Rust Forms on Grill Grates
Rust is the result of a simple chemical process: when iron or steel is exposed to both oxygen and moisture, it oxidizes. While this can happen to any unprotected metal, grills face extra challenges because they’re exposed to high heat, grease, and — in many cases — the elements.
Some of the most common reasons rust forms on grill grates include:
- Moisture after cleaning: Washing grates and not drying them completely is one of the fastest ways to cause rust. Even a small amount of water trapped in corners can start the process.
- Weather exposure: Storing your grill uncovered allows rain, dew, and humidity to settle on the grates.
- Damage to protective coatings: Chips or scratches in porcelain or enamel expose the metal beneath, which is far more vulnerable to oxidation.
- High-salt environments: If you live near the coast, salt in the air can accelerate rusting dramatically.
- Neglect after cooking: Leaving food residue and grease behind traps moisture against the metal surface.
Even stainless steel, which is more rust-resistant than other materials, can eventually oxidize under these conditions. The key to prevention is understanding these triggers so you can avoid them — and to act quickly when you first notice signs of corrosion.
Checking the Severity of Rust
Before you start scrubbing, it’s important to figure out whether you’re dealing with surface rust or deep pitting. This determines whether your grates can be restored or if replacement is the smarter option.
Surface rust is a thin, flaky layer that sits on top of the metal. It usually looks patchy and comes off with gentle cleaning. If caught early, it doesn’t leave permanent damage.
Deep pitting is more serious. This is when rust has eaten into the metal, creating small craters or holes. Pitting weakens the grate’s structure, and even if you remove the rust, the surface may still be rough, uneven, and more prone to future corrosion.
To check your grates:
- Visual inspection — Look for areas that are discolored but smooth (surface rust) versus areas with holes or craters (deep pitting).
- Touch test — Run your hand over the grates when they’re cool. If you feel raised flakes or rough craters, that’s a sign of more advanced rust.
- Flex test — Press lightly on the grate bars. If they feel soft, bend easily, or sound brittle when tapped, the metal may be too compromised to salvage.
If the rust is deep or covers most of the surface, professional grill repair and restoration can often save you from a full replacement — but in some cases, new grates are the safest route.
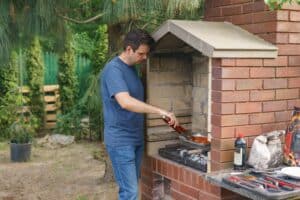
Step-by-Step: Removing Light Surface Rust
If your grates are only affected by surface rust, you can usually clean them up in under an hour. Here’s the safest way to do it without damaging the metal.
Step 1: Heat the grill
Turn the grill on high for about 15 minutes with the lid closed. This burns off loose debris and makes the rust easier to scrub away. Turn it off and let it cool until it’s warm but safe to touch.
Step 2: Brush off loose rust
Use a grill brush with stainless steel bristles for uncoated grates or brass bristles for porcelain-coated ones. Brush along the direction of the grate lines to avoid scratching the surface unnecessarily.
Step 3: Apply a mild acid
White vinegar or lemon juice works well to dissolve rust without harming the metal. Spray it directly onto the rusted areas or soak a cloth and drape it over the grate for 5–10 minutes.
Step 4: Scrub with a non-abrasive pad
After letting the acid work, scrub with a non-abrasive pad or brush to remove the remaining rust. Avoid steel wool unless working on bare cast iron and planning to re-season immediately afterward.
Step 5: Rinse and dry completely
Rinse with warm water, dry with a towel, then place the grates back on the grill over low heat for 5–10 minutes to evaporate hidden moisture.
Step 6: Re-season the grates
Lightly coat the grates with a high-smoke-point oil such as canola or avocado. This creates a protective barrier and improves nonstick performance.
When Rust Is Too Severe for DIY
Sometimes, even the most careful cleaning won’t save a set of grates. If the rust has eaten deep into the metal, weakened the structure, or spread across most of the surface, trying to restore it at home can be both time-consuming and ineffective.
Signs your grates are beyond safe DIY cleaning:
- Heavy pitting — Deep holes and rough craters that trap food and moisture.
- Flaking metal — Pieces breaking off when brushed or scraped.
- Weakened structure — Bars that bend easily or feel thin in spots.
- Recurring rust — Rust reappears within days or weeks after cleaning.
In these cases, a professional service has the advantage. At Fire & Metal, we use high-temperature steam cleaning and specialized rust removal tools that strip corrosion without gouging or over-thinning the metal. If the grates are too far gone, we can replace them on the spot — and check for hidden rust in burners, heat shields, and other critical components.
Preventing Rust from Coming Back
Once your grates are rust-free, prevention should be your top priority. Even a little bit of moisture or neglect can start the cycle all over again.
Daily habits after cooking:
- Brush the grates while they’re still warm to remove food residue.
- Apply a thin layer of high-smoke-point oil after cleaning to seal the surface.
Seasonal or monthly maintenance:
- Inspect for chips, scratches, or early rust spots.
- Give the grill a deeper clean every few months, including burners and drip trays.
Proper storage:
- Keep your grill covered when not in use.
- Store it in a dry location if possible — especially during wet or humid months.
Avoiding common mistakes:
- Don’t soak grates in water for long periods.
- Don’t leave the lid closed for weeks without checking — condensation inside can cause rust even when it’s not raining.
Conclusion
Rust on your grill grates isn’t just an inconvenience — it’s a sign your grill needs attention. Light surface rust can be removed at home with the right tools, a bit of patience, and good maintenance habits. But when corrosion is deep or widespread, professional restoration or replacement is often the safer and more cost-effective choice.
The key is acting early. The sooner you tackle rust, the easier it is to restore your grates and keep your grill cooking at its best. Whether you decide to DIY or let a pro handle it, consistent cleaning, proper storage, and preventive oiling will make all the difference.
If you’ve got rust that won’t quit, Fire & Metal can bring your grill back to life — often in a single visit. Schedule your free grill assessment today and see if your grates can be saved.