Oiling your grill grates might seem like an optional step—but it’s one of the most overlooked parts of proper grill maintenance. It’s also one of the easiest ways to prevent food from sticking, protect your grill from rust, and improve the flavor and appearance of whatever you’re cooking.
But not all oils—or oiling methods—are created equal. In this guide, we’ll walk you through:
- Why oiling grill grates matters
- When and how to do it properly
- The best oils to use (and which to avoid)
- And when oiling isn’t enough—and you need a deeper clean
Why Should You Oil Grill Grates?
There are three main benefits:
1. Prevents food from sticking
Oiled grates create a barrier between the metal and your food, reducing the chance that meat, fish, or veggies will tear or leave behind residue.
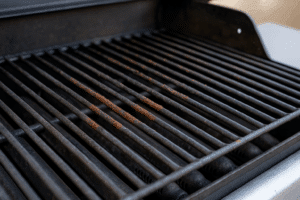
2. Protects grates from rust and corrosion
Especially with cast iron or non-coated steel grates, a thin oil layer after cleaning helps seal out moisture and air—two of rust’s favorite ingredients.
3. Helps maintain seasoning
Like a cast iron pan, your grates develop a seasoned surface over time. Regular oiling preserves that layer and keeps it performing like non-stick.
When Should You Oil Your Grill?
Before cooking:
The most important time to oil your grates is right before putting food on the grill. Do it after preheating—but before placing anything down.
After cleaning (optional):
If you’ve just scraped or steam-cleaned your grill, you can apply a light layer of oil to protect the surface until next use—especially if you won’t be grilling again soon.
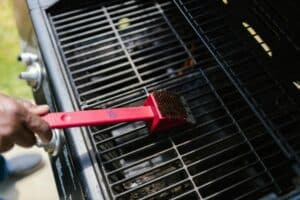
How to Oil Grill Grates (Step-by-Step)
Oiling isn’t complicated, but doing it wrong can actually create flare-ups or sticky buildup. Here’s the safe, effective way:
Step 1: Preheat the grill
Turn your grill on and let it heat up to medium or medium-high (around 400°F). This helps burn off any residue and preps the surface.
Step 2: Use high-smoke-point oil
Choose oils like:
- Canola oil
- Peanut oil
- Grapeseed oil
- Avocado oil
Avoid olive oil and butter—they burn at lower temperatures and can leave sticky residue.
Step 3: Soak a folded paper towel in oil
Don’t pour oil directly on the grates. Instead:
- Fold a paper towel into a tight pad
- Dip it lightly into a small bowl of oil
- Use tongs to hold it
Step 4: Wipe the grates quickly and evenly
With the towel held in tongs, swipe it across the hot grates a few times to coat the surface. You should hear a light sizzle—not a flare-up.
Step 5: Let it sit for a minute, then grill
Your grates are now ready to go.
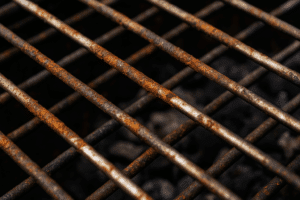
What Happens If You Don’t Oil Your Grill?
Skipping this step doesn’t mean disaster—but you might end up with:
- Stuck food and messy cleanup
- Stripped grill marks or torn proteins
- Faster rust and corrosion on uncoated grates
- Burnt-on residue that becomes harder to clean later
If your grill is already in rough shape (flaking grates, greasy buildup, or uneven flames), oiling won’t fix the problem—it’s time for a professional deep clean or restoration.
Do Different Grates Need Different Care?
Yes. Here’s a quick guide:
| Grate Type | Should You Oil It? | Special Notes |
|---|---|---|
| Cast Iron (Uncoated) | Yes, always | Oil after each cook and after cleaning |
| Porcelain-Coated Cast Iron | Sometimes | Avoid metal brushes; oil lightly before use |
| Stainless Steel | Yes | Won’t rust easily, but oil helps prevent sticking |
| Chrome-Plated | Yes | Lower heat tolerance—use high-smoke oil only |
If you’re unsure what type you have, schedule a free grill inspection and we’ll walk you through proper care.
Final Thoughts
Oiling your grill grates takes less than a minute—but saves you a lot of cleanup, frustration, and grill damage in the long run. It’s a simple step that makes a big difference in your cooking experience.
If you’re dealing with deeper issues like sticky buildup, rusting, or grates that won’t season no matter what you do—let our team help.
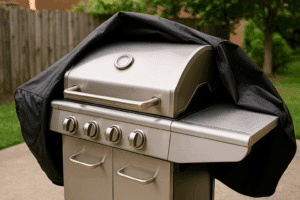
Fire & Metal offers steam-based deep cleaning and on-site grill maintenance throughout the Bay Area. We’ll restore your grill to peak condition and show you how to keep it that way.
Need help restoring your grates or cleaning up heavy buildup?
Book your free grill assessment →