What “Cheapest” Really Means in an Outdoor Kitchen Build
When homeowners ask for the cheapest way to build an outdoor kitchen, they are usually thinking about upfront cost. The problem is that the lowest upfront price is not always the lowest overall cost.
There are two very different definitions of “cheap”:
- Lowest initial spend — Spend as little as possible today.
- Lowest long-term cost — Spend strategically so you do not redo work later.
Many outdoor kitchens feel expensive not because the concept was wrong, but because the planning was rushed. That pattern is the same one that shows up when people later question whether outdoor kitchens are worth it. In many cases, the issue is not the investment itself — it is how the build was approached.
Before looking at tactics, accept this: the cheapest outdoor kitchen that still performs well is usually simple, phased, and intentional — not improvised.
Option 1 – DIY Outdoor Kitchen (Lowest Upfront Cost)
For many homeowners, a DIY outdoor kitchen feels like the obvious budget path. Labor is one of the largest expenses in any build, so removing contractor fees immediately lowers the entry cost.
What makes DIY cheaper upfront:
- No contractor labor
- Flexible timeline
- Ability to source discounted materials
For a basic grill island with no utility relocation, DIY can make sense. A framed base, weather-rated finish, and drop-in grill are manageable for someone experienced with tools.
However, savings shrink quickly once complexity increases.
Where DIY costs add up:
- Tool purchases
- Material waste from measurement errors
- Rebuilding sections that were framed incorrectly
- Hiring professionals later to fix gas or electrical issues
The boundary is usually utilities and structure. Gas lines, electrical planning, and ventilation are not forgiving. Many of the most common failures in outdoor kitchens begin exactly here, which is why understanding common outdoor kitchen mistakes matters before committing to a full DIY build.
DIY works best when the design is intentionally minimal and the homeowner is realistic about limitations.
Option 2 – Prefab or Modular Outdoor Kitchen Kits
Prefab and modular outdoor kitchen kits sit between DIY and full custom builds. They offer clearer pricing and faster installation while reducing some design risk.
Advantages of prefab or modular kitchens:
- Pre-engineered structure
- Shorter install time
- Predictable configuration
These systems reduce guesswork. Components are designed to fit together, and installation is more controlled than a fully custom build.
Limitations to consider:
- Limited customization
- Material quality varies significantly
- Utility access may not align with your yard layout
- Long-term durability depends heavily on manufacturer standards
Prefab can be the cheapest way to build an outdoor kitchen if speed and simplicity are priorities. It becomes less cost-effective when homeowners try to heavily modify it or force it into a layout it was not designed to support.
Option 3 – Phased Custom Build (Often the Smartest Budget Strategy)
A phased custom build is rarely the cheapest on day one, but it is often the cheapest over time. Instead of installing everything at once, the structure is built correctly from the start, and appliances or upgrades are added in stages.
A typical phased approach looks like this:
Phase 1 – Foundation and structure
- Proper framing and base
- Utility rough-ins (gas, electrical, water if needed)
- Core countertop space
This stage protects the project from future rework. Utilities are installed once, correctly sized for expansion, and positioned intentionally.
Phase 2 – Core cooking setup
- Built-in grill
- Basic storage
- Minimal finishing details
At this point, the kitchen is fully usable.
Phase 3 – Upgrades over time
- Side burners
- Refrigeration
- Additional storage
- Shade or overhead structure
This strategy prevents the most expensive mistake in outdoor builds: tearing out finished work to upgrade something that was undersized or poorly placed. Many of the projects that later require corrections follow patterns described in common outdoor kitchen mistakes, especially when homeowners try to retrofit utilities after the fact.
A phased build costs more upfront than a bare-minimum DIY island, but it avoids duplicate labor and structural modifications later.
Where You Should Not Cut Costs
There are specific areas where trying to save money creates long-term risk. These components determine safety, performance, and durability.
Gas lines and regulators
Improper sizing affects flame performance and safety. Gas work is not a cosmetic detail. It should be installed once and installed correctly.
Electrical planning
Undersized circuits limit future appliance additions. Retrofitting electrical work later often requires opening finished surfaces.
Structural framing
Outdoor kitchens are exposed to moisture, heat, and movement. Inadequate framing leads to shifting countertops, cracked finishes, and instability.
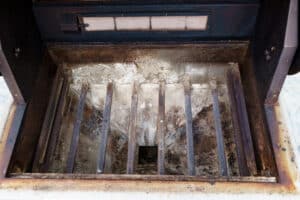
Weather-exposed surfaces
Cheap materials that are not rated for outdoor exposure deteriorate quickly. Countertops, cabinet faces, and hardware must tolerate UV, grease, and moisture.
These are not luxury upgrades. They are the backbone of the kitchen. Cutting costs here usually results in repairs that erase any savings.
For homeowners who want the structure done correctly from the beginning, working with specialists focused on professionally planned outdoor kitchens prevents expensive rebuilds later.
Realistic Budget Expectations for a “Cheap” Outdoor Kitchen
While a full cost breakdown deserves its own guide, it helps to understand general ranges.
- Basic DIY grill island: lowest upfront investment, but limited flexibility
- Modular or prefab setup: moderate cost, faster install, less customization
- Custom phased build: higher initial investment, lowest likelihood of rework
According to guidance from the National Association of Home Builders, durable materials and proper utility installation significantly affect long-term remodeling costs, especially in outdoor environments where exposure accelerates wear. Spending slightly more on structural integrity often reduces total ownership cost.
The cheapest way to build an outdoor kitchen is not the one with the smallest price tag. It is the one that avoids redo work, supports future upgrades, and aligns with how the space will actually be used.
Bottom Line – The Cheapest Way That Still Makes Sense
If the goal is to build an outdoor kitchen on a budget, simplicity wins. A compact layout, correctly installed utilities, and durable materials will outperform a larger, improvised build every time.
The lowest-cost path is usually:
- Keep the footprint modest
- Install utilities correctly the first time
- Add upgrades later instead of all at once
That approach protects the structure, prevents costly corrections, and keeps the kitchen usable as your needs evolve.
In short, the cheapest way to build an outdoor kitchen is not about removing pieces. It is about building the right pieces in the right order.