Introduction
One of the most frustrating grill problems is when everything seems to be working — the burners light, the flame is there — but the grill just won’t get hot enough.
Food takes longer to cook, searing becomes impossible, and the whole experience feels off. This isn’t just inconvenient. Low heat usually means something in the system isn’t working as it should.
Unlike ignition issues where the grill won’t start, or uneven heat where one side struggles, this problem is about overall weak performance. The grill is running, but it’s underperforming.
The good news is that this issue is almost always diagnosable. In most cases, it comes down to airflow, gas flow, or buildup restricting how the grill operates.
This guide will walk through what normal heat should look like, the most common causes of low heat, and how to figure out exactly what’s going wrong.
What “Normal Heat” Should Look Like
Before diagnosing a problem, it helps to know what a properly functioning grill should do.
Temperature range
Most gas grills should be able to reach:
- 450–550°F for standard cooking
- 600°F+ for high-heat searing
If your grill struggles to get past 300–350°F, something is limiting performance.
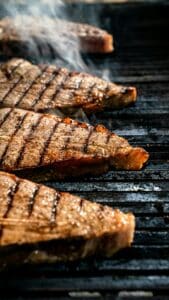
Flame appearance
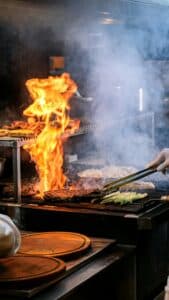
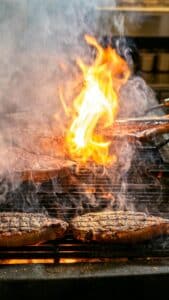
Healthy flames should be:
- Mostly blue
- Even across all burners
- Consistent in height
Small yellow tips are normal, but large yellow or uneven flames indicate airflow or combustion issues.
Preheating behavior
A properly working grill should reach cooking temperature within 10–15 minutes. If preheating takes much longer or never reaches target temperature, it’s a clear sign something is off.
Low heat isn’t always obvious at first, but once you notice longer cook times or difficulty searing, it’s usually already affecting performance.
Most Common Causes of Low Grill Heat
Low heat almost always comes down to restricted gas flow, poor airflow, or buildup interfering with combustion.
Dirty or clogged burners
Burner ports can become blocked with grease, debris, or rust. This restricts how gas exits and reduces flame strength.
Grease buildup inside the grill
Grease doesn’t just sit in trays. It coats internal surfaces and restricts airflow, which affects how efficiently the grill burns gas. If buildup is present, our guide on removing grease buildup from a grill explains how it impacts performance.
Low or restricted gas supply
A nearly empty propane tank or a regulator that’s limiting flow can significantly reduce heat output.
Blocked venturi tubes (air intake)
Burners need air as well as gas. If airflow is restricted — often by debris or spider webs — combustion weakens.
Regulator issues
Gas regulators can enter a “low flow” state if the tank valve is opened too quickly. This limits pressure and reduces heat output across all burners.
Damaged or worn burners
Over time, burners can corrode or warp, which disrupts flame distribution and reduces overall heat.
Most of these causes are interconnected. For example, buildup can affect both airflow and burner performance at the same time.
How to Diagnose the Problem Step-by-Step
Low heat issues are usually identifiable with a simple, structured check. The goal is to isolate whether the problem is fuel, airflow, or buildup.
Step 1: Check the propane tank
Start with the simplest variable.
- Is the tank low or recently replaced?
- Try a known full tank if you’re unsure
A weak tank can mimic bigger issues.
Step 2: Reset the regulator
If the tank valve was opened too quickly, the regulator may restrict gas flow.
To reset:
- Turn off the grill and tank
- Disconnect the regulator
- Wait 1–2 minutes
- Reconnect
- Slowly open the tank valve
- Light the grill normally
This alone solves a surprising number of low heat issues.
Step 3: Inspect the flame
Turn on the grill and observe:
- Weak flames across all burners → likely gas flow issue
- Strong in some areas, weak in others → likely burner blockage
Step 4: Check burner ports
Turn everything off and let it cool.
Remove grates and heat shields:
- Look for blocked holes, grease, or rust
- Clean gently if needed
Step 5: Inspect venturi tubes (air intake)
Check where air enters the burners:
- Look for spider webs, grease, or debris
- Clear carefully
Airflow issues often get overlooked but are a major cause of weak heat.
Step 6: Re-test heat output
After cleaning or adjustments, fire the grill again and check if it reaches proper temperature.
This process usually pinpoints whether the issue is simple or something deeper.
Cleaning vs Mechanical Issues
Once you’ve gone through the checks, the next step is deciding what kind of problem you’re dealing with.
When cleaning is enough
- Burner ports were blocked
- Grease buildup was visible
- Venturi tubes had debris
- Heat improves after cleaning
In these cases, restoring airflow and gas flow solves the issue.
When it’s a gas flow problem
- Flames are weak across all burners
- Regulator reset improves performance temporarily
- Tank or regulator is inconsistent
This points to fuel delivery, not cleaning.
When components are failing
- Burners are corroded or damaged
- Flame pattern stays uneven after cleaning
- Heat output doesn’t improve at all
At this stage, parts may need repair or replacement.
Many low heat issues overlap with burner performance problems. If cleaning doesn’t fix it, our guide on why grill burners won’t light or heat properly explains how deeper component issues affect overall performance.